Restaurant review: Ravintola Taivaanranta, Lahti

If you ever find yourself in Lahti, Finland (even if it is quite unlikely), and are a friend of good food, you might want to visit Ravintola Taivaanranta. I would say it’s the best restaurant this city has to offer, and I’d like to think I know a thing or two when it comes to good dining experiences. The city hosts multiple international events every year, from classical music to sporting events, including the FIS World Cup, so I’m hoping this review could be useful to some. I visit the city (it’s my hometown) with my husband few times a year, and tend to always gravitate towards this restaurant. Sure, we have also tried the other upmarket restaurants around here, but think this is the best one by far. The restaurant has a small distillery downstairs, and you might even want to sample their own whiskies and beers. Also, in terms of ambience, I find this to be the nicest and most comfortable place.

We went to the restaurant around 4.30pm without a booking. Taking into consideration that it was early Friday evening, a week before Christmas and the place is very popular, the restaurant did very well to accommodate us by shuffling their table plan. They are open all day from 11am until 10pm, which is very suitable to those browsing the shops and getting hungry at unusual hours.

We decided to opt for the 5-course Tasting Menu. At €61 per person, the price seems decent.

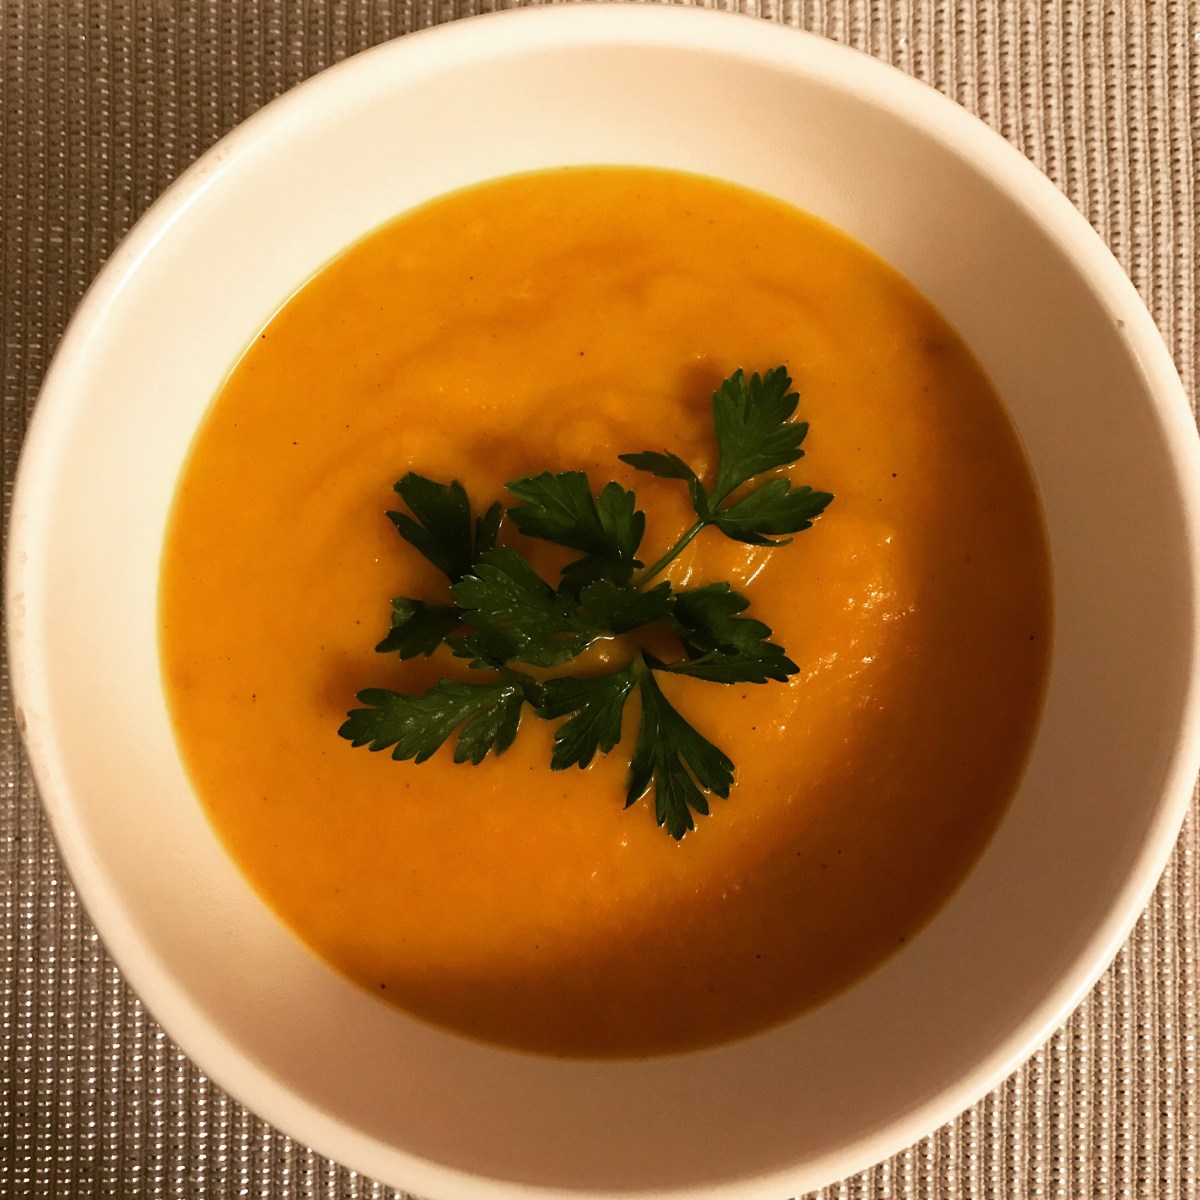
The meal started with a decadent, flavoursome Lobster Soup. It was smooth, rich and creamy, yet the lobster flavour was still very well present rather than disguised by cream. And it went perfectly well with our champagne aperitif.

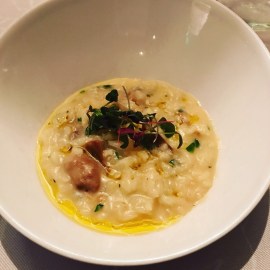
Soup was followed by Boletus (mushroom) Risotto. It was quite mild in flavour, yet pleasant in taste. I thought the risotto itself could’ve been ever so slightly more al dente, however my husband didn’t think that was required.

We had a bottle of 2007 Amarone Della Valpolicella (this wine always brings nice memories, as it’s the red wine we served at our wedding). The first bottle was corked. This of course is not the restaurant’s fault, and the only reason for mentioning it is because they dealt with it very professionally. Soon enough we were enjoying a perfect bottle.

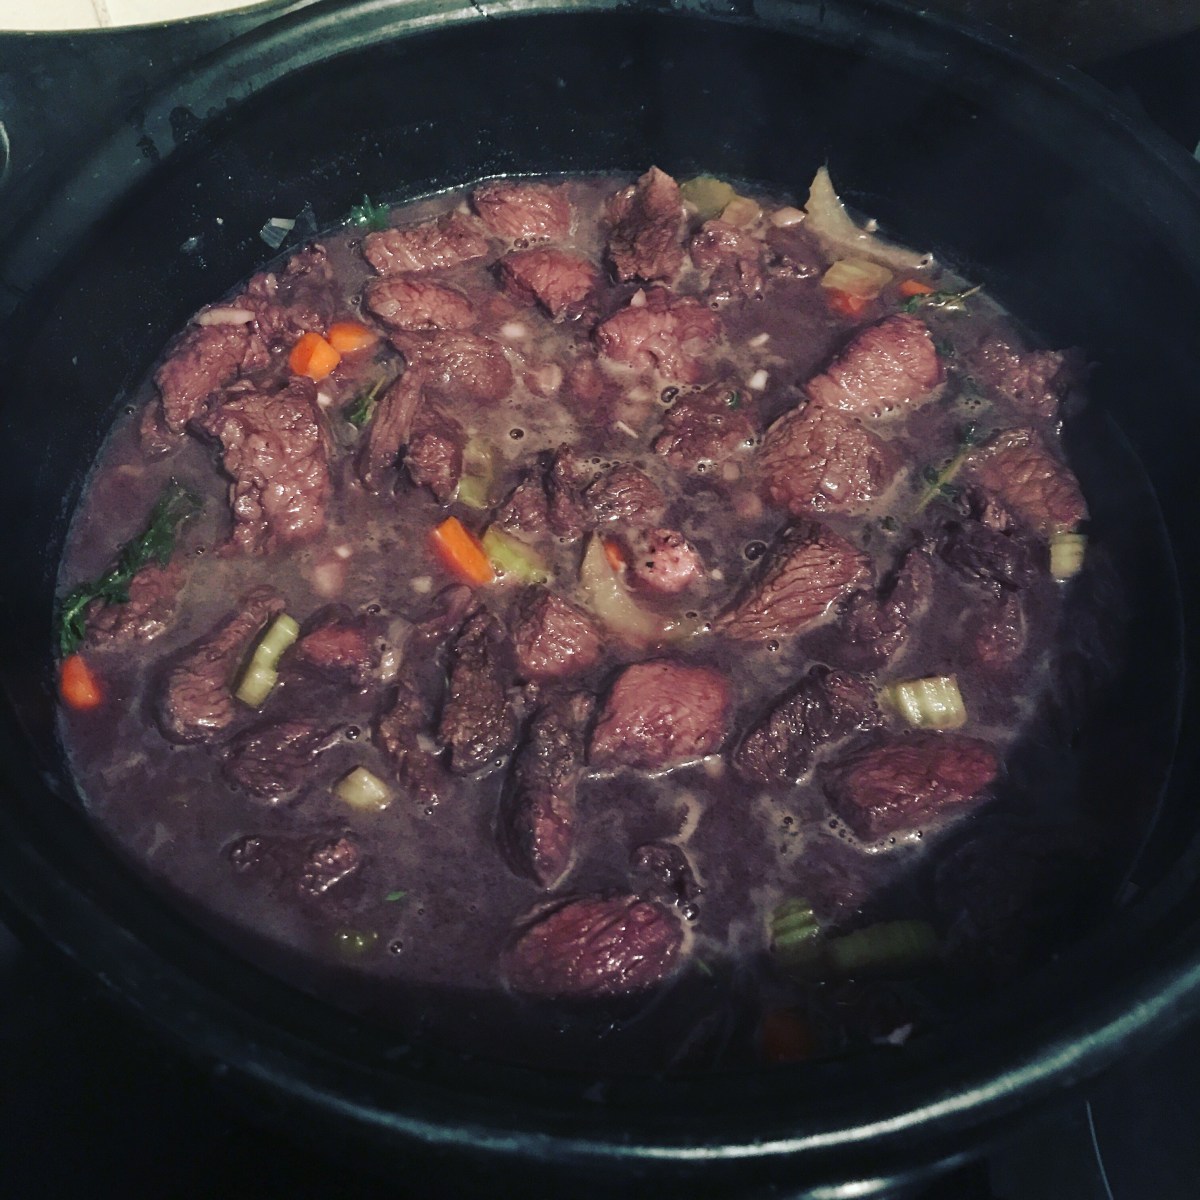
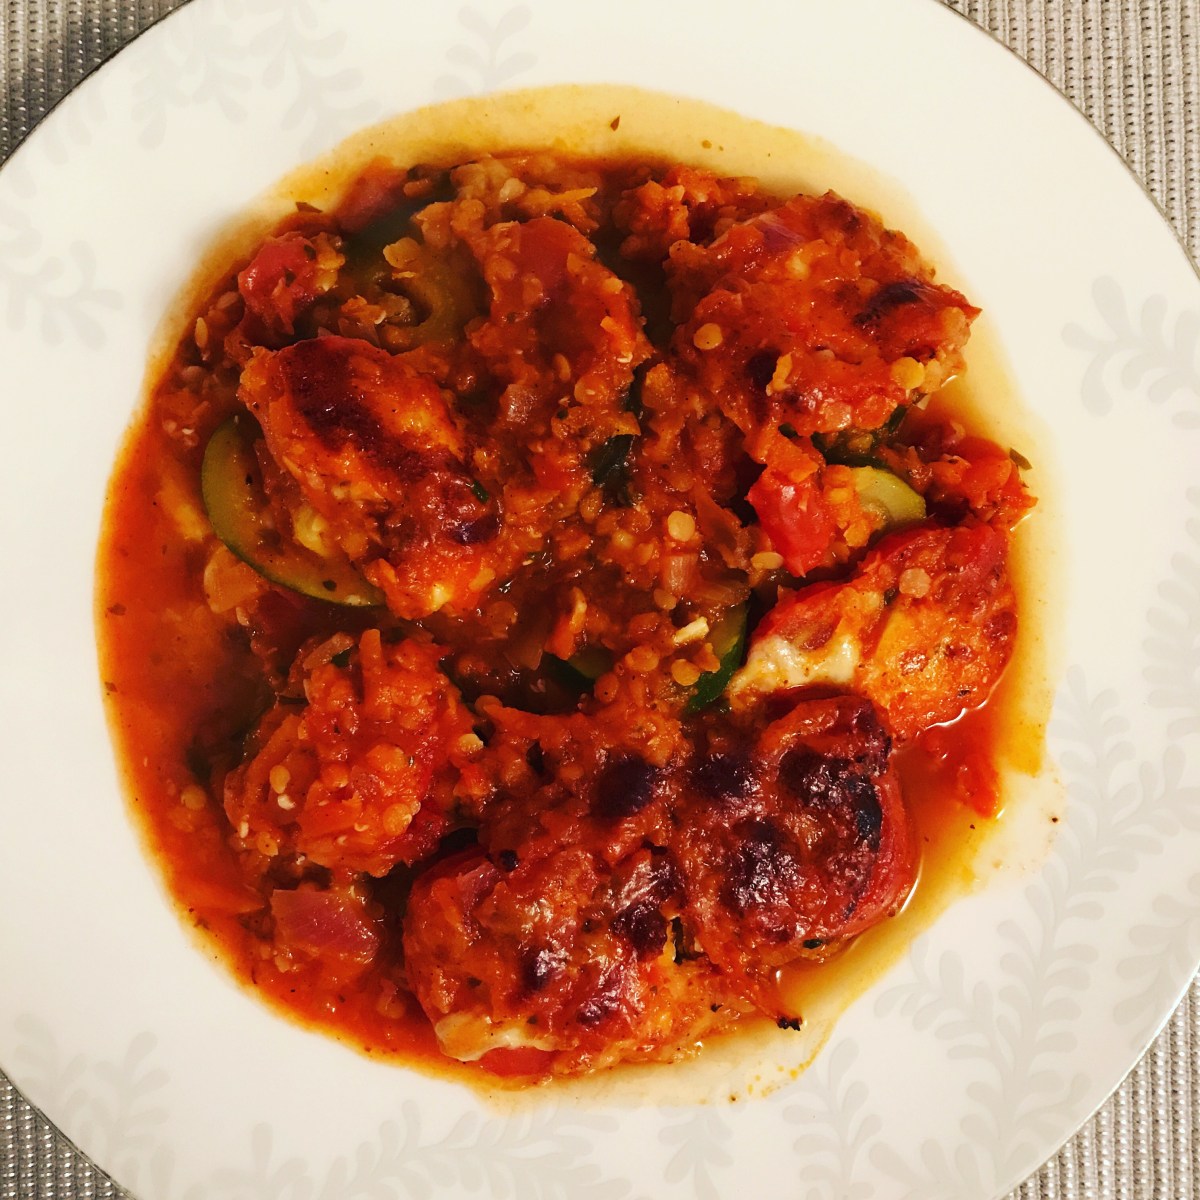
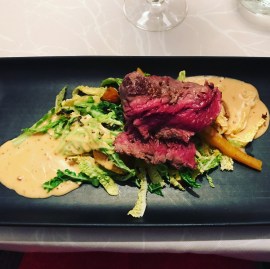
Next course was fillet of beef, Whisky Pepper Steak. The cooking of their fillet steak has kept us going back to this restaurant in the past over and over again, as it’s right up there with the best Michelin star restaurants we’ve dined in (we’ve been to around 40, ranging from one to three starred). We both had our steak medium rare, and it was perfect for us, however I could see someone might think it being on the borderline of being just a tad too rare. For my taste, something on the plate was a little bit salty, however I couldn’t really pinpoint what it was. My husband didn’t think this, so it might just be a question of personal taste, and it didn’t stop me from cleaning the plate.

img_1564

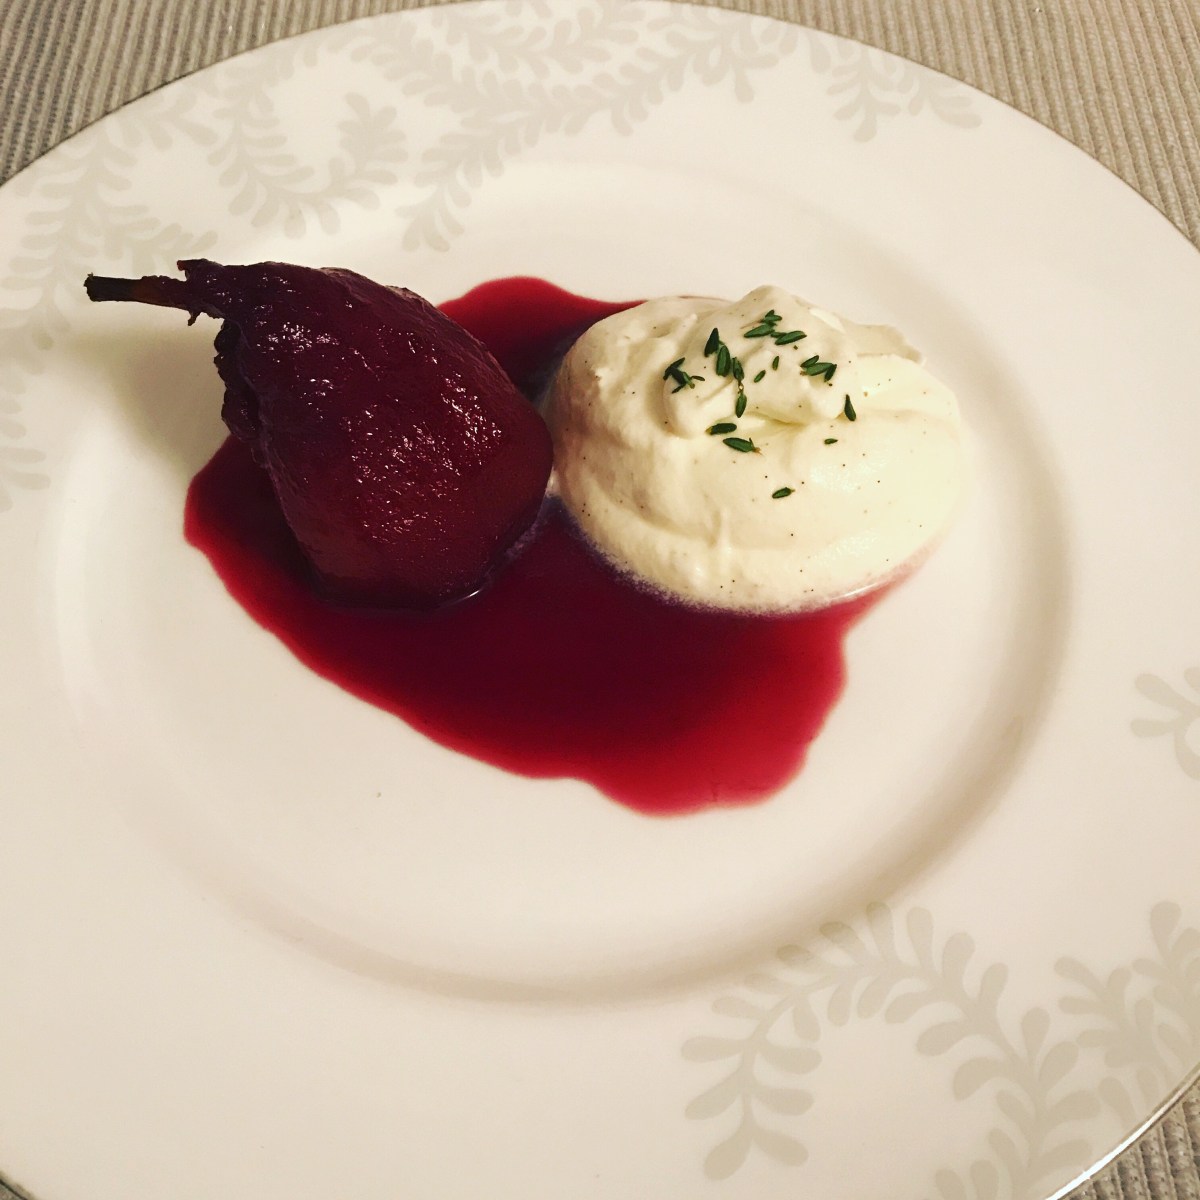
Next was Chocolate Sorbet. I would strongly advise you to try this, even if you’re not normally a fan of sorbets. You could be fooled into thinking that it’s actually very dense, chocolatey ice-cream.

Last course was Cheese (Viinitarhurin juusto) with apple jam. I’m a lover of strong cheese, and even though this wasn’t that strong, it was pungent enough to satisfy me. The sweetness of the apple jam also went nicely with this medium-hard cheese.

img_1566

After this we had a couple of drinks at the bar, with a bar food platter of smoked vendace toast, crayfish tortilla and cured ham. I would recommend to everyone even just to pop in for this if passing by, the smoked vendace toast is a delight.

img_1567

I would definitely recommend this restaurant. From a traditional fine dining point of view, considering we had a five-course tasting menu, the portions were very generous, however we must’ve been very hungry because we managed to finish all plates. For most, having big portions is probably not something that would be seen as a negative, so this will serve everyone, even if you have a big appetite.

Rating:★★★☆☆

Seafood pasta

This is a simple and tasty dish, and I would also encourage everyone to have a go at making their own pasta. You only need two ingredients for basic pasta; flour and eggs. You can then make different variations with tomato purée, spinach or even squid ink if you’re feeling adventurous. For this recipe I used tomato purée. The octopus I use is already cooked (steamed in it’s juices), so it doesn’t require much additional cooking.

Serves 3
250g flour, preferably fine 00 grade pasta flour
2 eggs
1 tbsp tomato purée
~~~~~
200g cherry tomatoes
juice of one lemon, or 2 tbsp.
1 courgette / zucchini
25g bunch or parsley, chopped
2 octopus tentacles, about 225g
90g small scallops
1-2 squids, about 150g, thinly sliced
150g raw king prawns
2 shallots
2 cloves garlic
2 tbsp olive oil
pinch of salt, to taste
coarsely ground black pepper


1. Measure the flour in a bowl. I used fine 00 grade pasta flour, but I have also in the past used normal plain flour. Make a well in the centre, and tip the eggs in. Start mixing the eggs with a fork, slowly incorporating the surrounding flour into the eggs. When it gets quite firm, I find it’s difficult to continue mixing with the fork, so I change to kneading by hand. Even though I use large eggs, I don’t tend to use all of the flour. Keep the dough soft, but not sticky.

2. I wanted to make tomato pasta today. For this, warm the purée in a pan, and once you’re happy with your standard dough, knead it into the dough. To make it easier to mix it into the dough, make sure your workstation has flour on it.

img_1495


3. I would recommend investing on a pasta rolling machine. At a low cost you will get a useful helper to your kitchen for pasta making. Cut the pasta dough into four pieces, and repeat the steps with all of the pieces. Flatten the piece into about 1cm / half an inch thickness. Set your machine on the biggest setting (7). Push the end of the piece right onto the rollers, and roll. The piece should now go through. Once the dough has come out, fold in half, and put through the same setting again. After this, reduce the setting to 6, and roll through once, then same with settings 5,4 and 3.


4. With floured hands, pat the pasta sheet on both sides. Then, roll the sheet through the tagliatelle roller. Separate the tagliatelle strands, and place on a baking sheet. Once you have prepared all dough pieces this way, leave to dry while you prepare the seafood sauce.


5. Finely chop the shallots and garlic, and fry in olive oil for 1-2 minutes.

6. Add the squid and king prawns, and fry for about 3 minutes. Then add the small scallops, and fry for another 3-4 minutes, stirring. Season with salt and pepper.

7. Add the courgettes to the pan, and fry, stirring, for 2 minutes. Pour the lemon juice into the pan.

8. Add the octopus and tomatoes, and heat through.

9. Tip the chopped parsley into the pan, and stir.

10. Boil water in a large pan, with a good splash of salt. Add the pasta into the boiling water. The fresh pasta will only need to cook for 3 minutes. Strain, and add to the seafood sauce.

Braised ox cheek (or braising beef)

My recipe is originally for ox cheek, which are big pieces,  but as this isn’t something generally sold in supermarkets (and therefore requiring a trip to the butchers, which I unfortunately don’t often have time for), I think it also works with the beef braising steak, which I happened to have in my fridge this time. I do however have to honestly say that I prefer the cheek.   Both are parts of the animal that are tough and require slow cooking to make them melt-in-the-mouth soft. The cheeks in particular used to be more of a wasted part of the beef, but in the recent years upmarket restaurants have made it more fashionable. I would love to make this dish more often, as I love the braised ox cheek, but my husband doesn’t count braised meat as one of his favourites.

Ideal situation would be to marinade the meat for 24 hours, however if this isn’t possible I would go for minimum of two hours.

2 ox cheeks (or 750g beef braising steak)
300ml red wine
100ml port wine
1 small onion / 4 small shallots, finely chopped
1 stalk of celery, roughly chopped
1 carrot, roughly chopped
5 cloves of garlic, smashed and roughly chopped
6 stalks of fresh thyme
1 tbsp of black pepper (I tend to freshly crush whole peppercorns with pestle and mortar)
1 bay leaf

img_1423

1. Place all ingredients in a bowl, and marinade for 24 hour if possible for best result, or minimum of 2 hours.

img_1422

2. Fry the meat pieces for few minutes, stirring, then add the other ingredients.

3. Simmer for 2.5 hours.

4. Once the meat is tender, remove from the liquid (mostly for ox cheek, difficult otherwise).

5. Strain liquid through fine sieve. You can also use a piece of muslin in the sieve for finer result. Boil the strained liquid in a clean pan until reduced to half.

6. Quickly fry the meat pieces and serve with the red wine glaze (if ox cheeks).

Sea bass with Greek salad

This simple, healthy meal is perfect for those evenings when you get home from work very late, and don’t really have that much energy for cooking, as it requires minimum amount of effort and cooking. Greek salad itself is very simple, with only a few ingredients, and there are many variations of this basic salad. You can always adjust it with additional ingredients to suit your taste. I served my dish with boiled baby potatoes and samphire. The below Greek salad recipe may be salty to some tastes, you can reduce the amount of feta and olives, or increase the amount of other ingredients to change the ratio of ingredients.

serves 2
2 sea bass fillets
splash of olive oil
salt
black pepper
~~~~~
2 leaves of romaine heart lettuce
few handfuls of cherry tomatoes
half a cucumber
red onion
200g feta cheese
200g olives
2 tbsp capers
1/2 dl olive oil
1-2 tbsp lemon juice
2 tsp white wine vinegar
2 tsp dried oregano

1. Cut the tomatoes, salad leaves, cucumber, feta, and onion, and add the olives and capers.

2. Mix the olive oil, lemon juice, vinegar and oregano together, and pour over the salad. Mix well, turning the ingredients so that all are coated with the oil mixture. Rest in the fridge whilst cooking the fish.

3. Heat a splash of olive oil in a pan, and place the fish in the pan, skin side down. Season the flesh with salt and pepper, and cook for 3-5 minutes, to crisp the skin up.

4. Place in a preheated oven 180°C / 355°F for about 7 minutes.

Salt crust baked crispy skin pork belly

I’ve had good pork belly with perfect crispy skin in restaurants, and I’ve also had not so good ones. I’ve tried to cook it myself unsuccessfully too, until now. You see, the crispy skin is an absolute must making this dish a fantastic one. If I have pork belly with a disappointing skin, I feel cheated. In the past, the prep of the pork has required scoring and spice rubbing of the skin, and then still ending up with either half cooked or too cooked skin that’s thick and tough. No more of this problem, since after my extensive research I decided to try salt crust baked method. It worked beautifully, and gave me the best pork belly I’ve ever cooked!

900g – 1kg piece of pork belly

Marinade
1 clove garlic
2-3 stalk of fresh thyme, leaves only
2 tbsp olive oil
pinch of salt
pinch of black pepper

Salt crust
1-2 dl table salt, depending on the size of the meat

1. Dry the piece of meat on all sides with a kitchen tissue. Mix the marinade ingredients together, and rub on the meat side only. Put in a container, skin side up. dry the skin again, cover and leave in a fridge for 2 hours (or longer).

2. In a roasting tin, add about 1cm (half an inch) of water at the bottom. Place the pork on a rack. Pat dry the skin once more, and pour the salt on the skin. The salt will become a hard crust during cooking, and will be easy to remove later on. There is no need to score / slit the skin.

img_1388-1

3. Cook at 170°C / 340°F for 40 minutes.

4. Remove from the oven, and turn the heat up to 240°C / 465°F. Remove the salt crust. If any salt has fallen onto the meat on the sides, scrape off. Cook in the hot oven for further 30 minutes. You should end up with a perfectly crispy, golden colour skin and juicy meat.

5. Rest the meat for about 5-10 minutes, covered with foil.

Poached pear with vanilla and mascarpone mousse

I’ve not really used pears in cooking much, but was recently inspired to have a go. I spent a long time looking at various recipes, and in the end combined a few. This dessert is perfect for this time of the year, with winter spices of cardamom and cinnamon. After poaching the pears the red wine mixture gets reduced to syrupy wonderfulness. I also think vanilla is better used in the mascarpone mousse, rather that the red wine jus. It’s pretty simple to make, and I’m pleased I made this, as I’ll for sure be making this again.

4-6 pears
1 bottle (750ml) of red wine (I used Merlot)
3 cardamom pods, bruised (place knife flat on the pod, and hit with your hand)
1 cinnamon stick
200g caster sugar
1 lemon, grated zest and juice
~~~~~
1/2 dl caster sugar
~~~~~
250g mascarpone cheese
4 egg whites
1 tbsp caster sugar
1 vanilla pod

1. Peel the pears. Cut the bottoms off, and core them. (I forgot to peel them first, but it will be easier if you do it first).

img_1378

2. Put the prepared pears in a pot, together with the cinnamon, cardamom, lemon zest (save the juice for later), sugar and red wine. Bring to boil, and simmer, covered, for 20-30 minutes, until soft.

3. Remove the pears, and boil the liquid,  uncovered, to reduce. During the boiling add the lemon juice and 1 tbsp of sugar. Reduce at least until half the original volume, the more you reduce the more syrupy and thicker it will be.

4. Whisk the egg whites and sugar until stiff foam. Cut the vanilla pod lengthwise in half. With a sharp knife, remove the seeds from inside both halves. Mix the seeds thoroughly with the mascarpone cheese, and add the whisked egg whites, little by little, carefully folding  together with the mascarpone.

5. Pour the red wine reduction through a sieve. Put the pear and mousse on a plate or a bowl, and spoon some of the sauce over the pear.

Eggs Royale

I love eggs. Normally, my midweek breakfast include boring soft boiled eggs just because it’s quick. Weekends, however, are a completely different kettle of fish. That’s when you have to reward yourself for the long, hard working week, preferably with this luxurious and decadent breakfast of Eggs Royale. There are different variations to this dish, for example if you were to do it with ham instead of cold smoked salmon it would be called Eggs Benedict. The only cooking you need to do is poach the eggs, and make the Béarnaise sauce. The latter may not be the easiest of tasks if you’ve not made it before, however I hope by following my instructions yours will be perfect!

serves 2

Béarnaise sauce
2 tbsp finely chopped onion
5 freshly ground white peppers, or 3 shakes of ground white pepper
2 parsley stalks
2 tarragon stalks
2 tbsp white wine vinegar
2 tbsp water
100g butter
2 egg yolks
1-2 stalks of tarragon, leaves only, finely chopped

1. Put the onion, pepper, parsley, tarragon, vinegar and water in a pan. Let boil until the liquid has reduced to about half. Strain the liquid.

2. Melt the butter.

3. Put the egg yolks in a bowl, and drizzle over the strained liquid.

4. The eggs will need to be cooked in a bain marie (hot water bath). This is actually not as complicated as it sounds, please don’t let that deter you from making this sauce! You need a pot with water at the bottom, which will be heated to boiling. It’s important that the bottom of the bowl with the eggs doesn’t touch the hot water, as this could result to your sauce splitting. Start adding the melted butter to the eggs in drops at first, mixing/whisking as you go, then slowly drizzling the rest. You need to keep mixing the sauce until thickened.

img_1025

5. Add the finely chopped tarragon leaves.

Poached eggs

1 tbsp vinegar

couple of pinches of salt

All you need to poach eggs successfully are spacious enough pan, spoon for stirring boiling water, slotted spoon for removing the egg from the water, a bowl for the cooked eggs to let excess water drain out. I tend to break the egg into a cup, to have one ready to be cooked as soon as one comes out of the boiling water.

1. Put vinegar and salt in the pan, pour water and bring to boil. Stir in the centre with a spoon, and immediately pour egg into the eye in the center. This, together with the vinegar and salt will hold the egg together.

img_1026

2. Cook for 3 minutes, and remove from the water with a slotted spoon. I tend to put the egg in a bowl first, to drain excess water, before plating it, otherwise you’ll end up with a soggy plate of food!

Glögi (mulled wine)

When you live in your native country, you take it for granted that you can just pop in to a shop and get whatever delicacies you happen to fancy. If you have however settled abroad like me, you’ll have to learn to make things yourself. I know you can also buy mulled wine mixtures in the UK, however, since I created my recipe, I never felt the need to try them. Every year, I end up making a few batches of this, as you can’t stop having it once it’s ready! Also, it’s actually really easy to make.

1 1/2 liters water
1/2 liter apple and blackcurrant squash
1 liter blueberry juice
6 thumb size pieces of fresh root ginger, roughly chopped
6 cinnamon sticks
6 tbsp cardamom pods
2 tbsp whole cloves
1 orange, grated peel and juice
2-3 whole star anise

1. Put all ingredients together in a large pan, and bring to a boil. Simmer, covered, for an hour, and pour through a sieve, then bottle.

img_1368

2. When serving, I tend to fill 1/4 or 1/3 of the cup with red wine, and fill the rest of the cup with the spice mixture.

Spicy ginger and carrot soup

When I heard this combination mentioned recently I thought it makes sense. I also thought it sounds like something that could benefit from a bit of heat from a chilli, as well as the usual suspects onion and garlic. And I always tend to add potatoes to pureed soups, for that rich, smooth texture. I have just been experimental and  thrown ingredients together for this soup, however I do think the ginger, sweet carrot and spicy chilli make a good team. And did you know that ginger, chilli, garlic, onion and turmeric are all natural medicines to fight off those colds too, so perfect for boosting your immune system when the weather is getting cold outside.

4-5 medium-large potatoes (900g), peeled and cut into pieces
1 kg carrots, peeled and cut into pieces
100g fresh root ginger, peeled and chopped
2 garclic cloves, peeled and chopped
2 medium onions (I used red onions)
1 small green chilli (the smaller the variety, the hotter it will be), chopped
3 tbsp olive oil
1 tsp cumin powder
2 tsp turmeric (optional)
1 liter water
1/2 dl cream
salt and black pepper

1. Roughly chop onions. Heat the olive oil in a pan, and fry onion in medium heat for 5 minutes.

img_1358

2. Add the ginger, garlic and chilli, and fry for few minutes. Add turmeric and cumin, and fry until fragrant.

3. Add the carrots and potatoes, as well as water. Bring to boil, and cook, covered, for 45 minutes, or until carrots and potatoes are soft.

img_1357

4. Let cool slightly, and puree in a blender.

5. Add cream, and depending on thickness, a splash of water. Season with salt and pepper.

Vegetarian bake

This tasty vegetarian bake is a dish I learnt from my friend years ago, when we lived together as single ladies. Even though I’m more of a carnivore, this dish has stuck with me, and is something I make regularly, as it’s really flavoursome.

2 dl red lentils
1 onion
3 garlic cloves
1 carrot, peeled and grated
2 tins of chopped tomatoes
2 tbsp tomato puree
3dl vegetable stock
handful of fresh basil
3 tbsp olive oil
1 tsp salt
1 tsp ground black pepper
1 tbsp dried oregano
1-2 aubergines (eggplants)
4 large tomatoes
2 courgettes (zucchinis)
1-2 balls of mozzarella
grated parmesan cheese

1. Rinse the lentils, and drain in a sieve. Place in a saucepan, and cover with water. Bring to boil, and simmer for 15 minutes. Drain.

2. Finely chop onion and garlic, and fry in oil for 5 minutes. Add the carrot, chopped tomatoes, tomato puree, basil, stock, salt, pepper and oregano. Cook, stirring, for 5 minutes. Finally, add the cooked lentils.

img_1321

3. Slice the aubergines, courgettes, tomatoes and mozzarella.

4. Layer in an oven dish. I tend to put a little bit of the sauce mixture at the bottom, as well as in between each layer, and also on top.

img_1324

5. Sprinkle parmesan cheese on top and cook in preheated oven 200°C / 390°F for 40 minutes.