Aromatic rice with tandoori lamb steaks

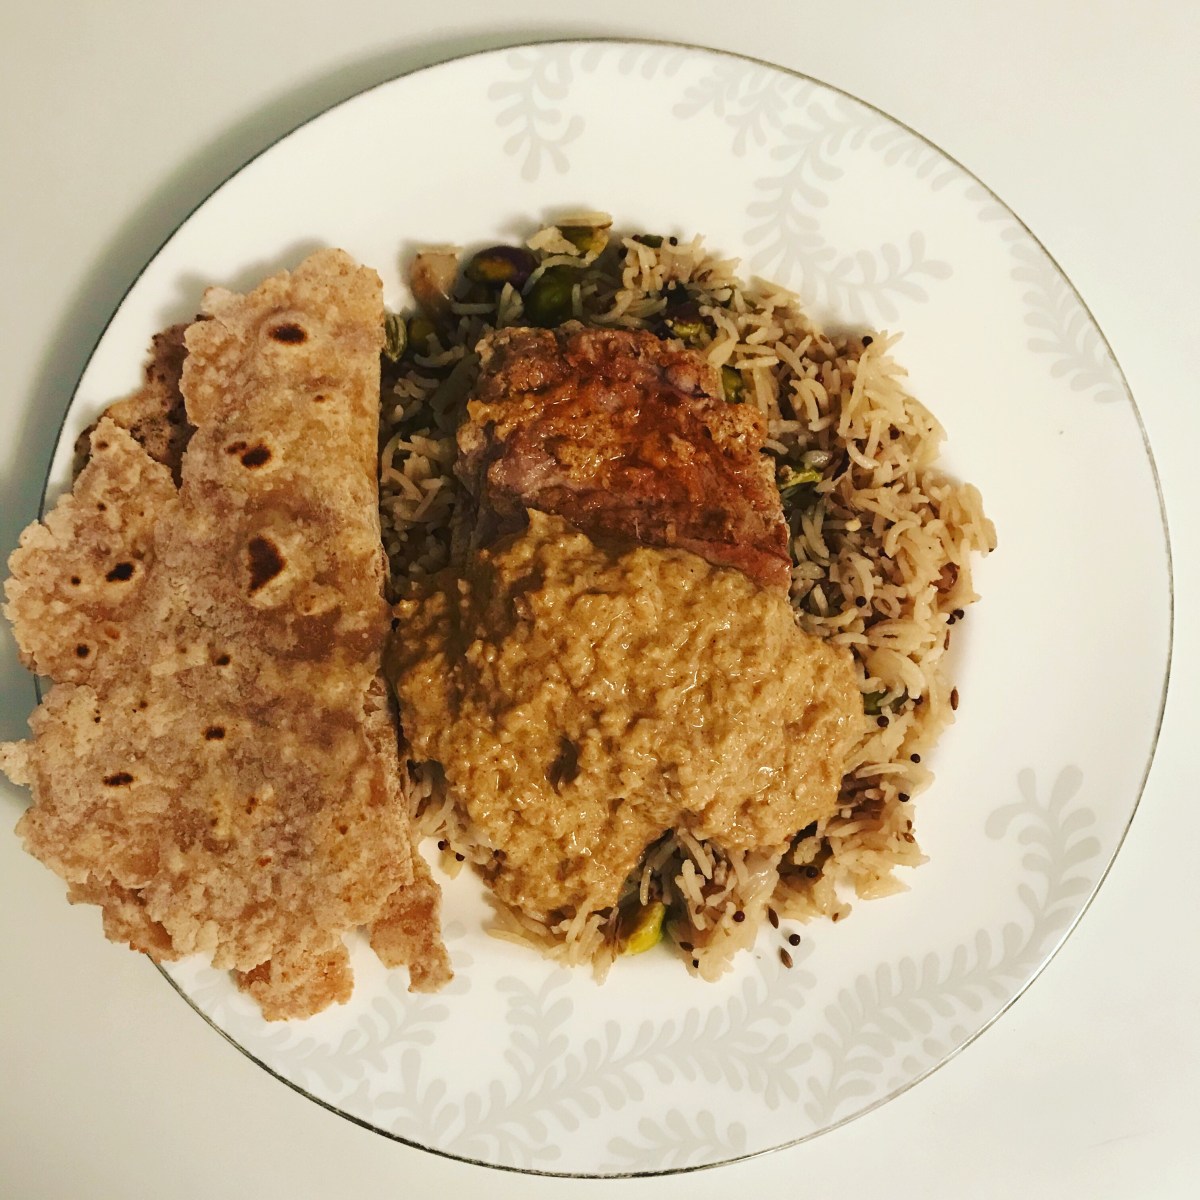
When my husband and I met, I was going through a cooking phase of making a lot of Indian curries from scratch. I still cook these, of course, however not as often as I used to back then. This particular rice is one of my favourites, and it comes with an amusing story. We were attending a friend’s BBQ party, and I brought all the ingredients for the rice with me, as well as marinated lamb cutlets, to finish the cooking at my friend’s house. The rice and the lamb were a huge hit,  and the rice became the most talked about topic of the whole party. One person, who was a vegetarian, said she was going to try it, and I mentioned to her that unfortunately it does contain chicken stock. She said she was still going to try it regardless, because everyone at the party was raving about the rice so much. She ended up asking me for the recipe.

Tandoori lamb
250ml natural yoghurt
1 onion, finely chopped
2 tbsp lemon juice
1 tbsp vegetable oil
1 tbsp fresh root ginger, peeled and finely chopped (about a thumb size piece)
3 garlic cloves, crushed
2 tsp chilli powder
1 tsp garam masala
1 tsp ground cumin
lamb

1. Mix all prepared ingredients together with the yoghurt. If you want the marinade mixture to be smooth, you can blend it in a food processor. This would normally be enough for at least four portions of meat.

2. Add the meat to the mixture, and make sure the meat is fully coated. Cover, and marinade in the fridge overnight, or as long as you can: you could prepare this in the morning, to cook later in the day.

img_3367

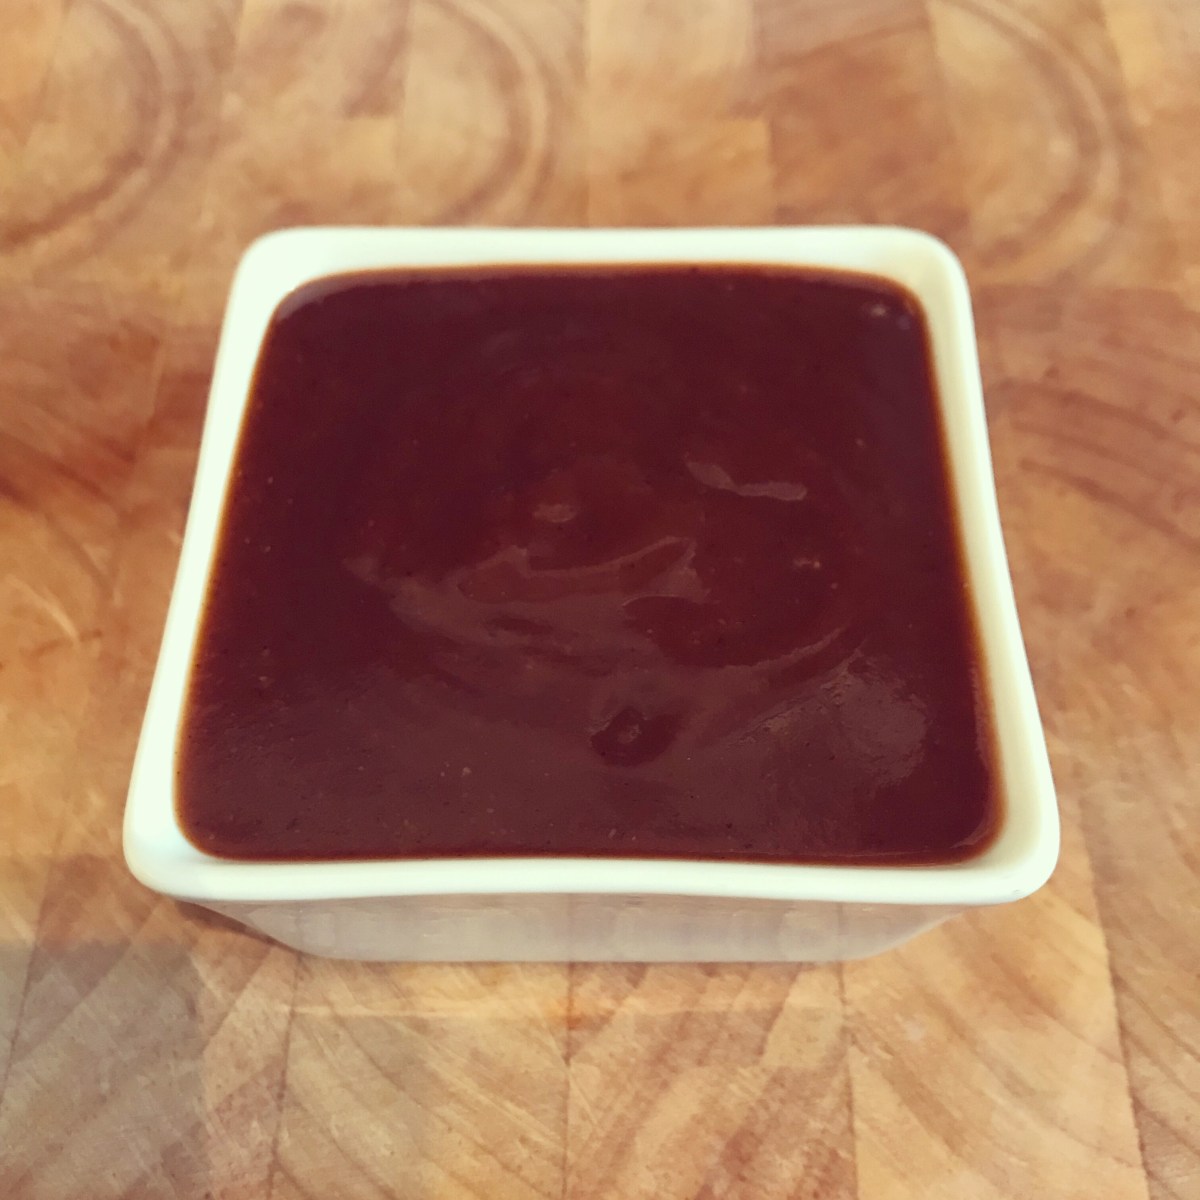
3. Fry the steaks for about 5 minutes on each side in a griddle pan with some oil, or on a grill (as I only used two steaks, I had a lot of leftover marinade. I poured it on a pan, and cooked it, to use as sauce).

Aromatic rice
2 onions, finely chopped
3 garlic cloves, crushed
3 tsp cumin seeds
2 tsp black mustard seeds
4 cardamom pods, bruised
2 bay leaves
2 dl shelled pistachio nuts
3 dl uncooked basmati rice
5 1/2 dl chicken stock
1 tbsp ghee or vegetable oil

1. Wash the rice thoroughly, until the water doesn’t isn’t cloudy anymore (this gets rid of the excess starch). Drain well.

2. Prepare the stock. You want this to be warm when you use it.

3. Prepare / measure other ingredients. I usually tend to measure all dry spices that get used at same stage, in one cup. Best way to bruise the cardamoms is to place the flat surface of a wide knife on top of the pod, and bash it with a fist.

4. Heat the ghee / oil in a pan. Cook the onions, garlic, spices and nuts, stirring, for about 5 minutes, until the onions are browned slightly and the mixture is fragrant.

img_3377

5. Stir in the rice and stock, and bring to boil. Lower the heat and simmer 15 minutes, covered. Once cooked, mix with a fork and stand, covered, for 10 minutes.

img_3372

Cauliflower and pomegranate ‘couscous’ with octopus

This light cold salad was a completely experimental creation of mine. I’ve been wanting to do something resembling couscous, but neither myself nor my husband are friends of the wheat couscous. I think cauliflower is a great, healthier replacement of it, as well as the texture of the cauliflower working very well. I’ve also recently been wanting to utilise pomegranates in cooking, and thought these two ingredients were going to be the ones I was going to build the rest of the dish around of. The pomegranate and the grapes bring sweetness, and to balance this I added lime juice and capers, and it worked really well. The end result is a delightful couscous salad that is fresh, sweet, sharp, salty and earthy all at the same time. You can serve the octopus warm or cold, I served it cold.

1 cauliflower
2 pomegranates
20 red grapes
1 lime – juice
3 tbsp capers
1 dl pine nut kernels
2 spring onions
handful of pea shoots
225g cooked octopus

1. Place all the cauliflower florets in a blender, and process to a grainy texture.

2. Cut the pomegranates in half. I find the easiest way to pick the seeds out without breaking the juicy outer coating, is to break the fruit by had piece by piece, and remove the seeds by hand. Half the grapes lengthwise.

3. Add  the lime juice, capers, finely chopped spring onions and coarsely chopped pea shoots. Cut the octopus to pieces of your liking. I cut the thicker ends of the tentacles to about 5-10mm thick pieces, and the thinner ends longer.

img_3336

Chicken Kiev meatballs

These chicken meatballs are a hybrid between Chicken Kiev and Chicken nuggets. They are in fact perfect served with BBQ sauce (click here for my homemade recipe). The garlic and parsley butter inside keeps it tasty and moist too.

650g chicken breasts
2 tbsp breadcrumbs
1 egg
1/2 tsp salt
1 tsp onion powder
1/2-1 tsp black pepper
~~~~~
Garlic and parsley butter
100g butter
2 garlic cloves, squeezed
handful of parsley, finely chopped
~~~~~
Coating for the meatballs
1 dl plain flour
1/2 tsp salt
1 tsp black pepper
1 tsp onion powder
2 eggs
4 dl breadcrumbs

1. Prepare the butter first. It might be a good idea to prepare it in advance, because first you’ll need it to get soft, and once you’ve mixed all the ingredients together you’ll need to leave it in the fridge to get hard again. Once you’ve mixed all ingredients together, roll in in a log inside cling film, and put in the fridge to harden. Once hardened, cut into discs, and quarter the discs.

2. Place all the chicken meatball ingredients in a food processor, and blend to a fairly smooth mixture. Take a handful, press a whole in the middle, and place a piece of the butter in the middle. Bring back to a ball, covering the butter all around.

3. Prepare the coating ingredients. On one plate / bowl, place plain flour with the spices and mix. On another the egg and on one more the breadcrumbs. With the breadcrumbs, first place about half the amount on the plate / bowl, and add more as needed. First, place each meatball in the flour mix, then the egg, and finally the breadcrumbs.

img_3294

4. Once the balls are ready, heat some vegetable oil in a pan. Fry for about 15-20 minutes in medium-high heat, turning around, until golden brown all around.

Salmon en papillote

En papillote cooking is an easy, mess-free and quick way of cooking food. You basically place all the ingredients per portion inside one parcel, which each diner will then have.

serves 2
2
salmon fillets (about 125g each)
6 tbsp frozen
peas (3 tbsp on each portion)
1/2
leek, sliced (split in two parcels)
4 tbsp
crème fraiche (2 tbsp per parcel)
2 tbsp tarragon or parsley, finely chopped (1 on each parcel)
dash of
black pepper
dash of salt

1. Preheat the oven to 200°C / 390°F. Remove peas from the freezer. The fish will cook quickly, so it might be better if the peas have defrosted a little bit.

2. Take 2 large non-stick baking parchment sheets. Place the salmon pieces on the sheets, at around 1/3 from front, leaving 2/3 at the back, so that you will be able to fold it on top. Season with salt and pepper. Add the leeks, peas, crème fraiche and herb.

3. Bring over the baking paper, to cover the fish. The front edges should be together. Roll until it reaches the fish. Then roll the ends. The parcels are now sealed, which means the fish will cook in it’s own  juices / steam.

img_3305

4. Cook in the preheated oven for 7 minutes.

img_3312

BBQ beef ribs

My recipe is for oven baked ribs, however if you want to grill yours on a barbeque you can still follow the marinating and BBQ sauce steps. This recipe will give you tasty, as well as nicely tender meat, which comes off the bone easily.

serves 2

Marinade
2 tbsp toasted sesame oil
2 tbsp dark soy sauce
2 garlic cloves, squeezed
2 tbsp dark muscovado sugar
1 tsp chilli powder
1 tsp paprika powder
1/2 tbsp black pepper
1/2 tbsp oregano
2 tsp mustard powder
1 tbsp onion powder
~~~~~
~600g beef ribs
BBQ sauce (click here for homemade BBQ sauce recipe)

1. Mix all the marinade ingredients together. Pour the mixture over the ribs, and rub onto the meat, so that all of the ribs are coated. Let marinate in the fridge for 1-2 hours.

img_3269

2. Heat oven to 120°C / 250°F. Place the ribs in an ovenproof dish, and cover tightly with foil. Bake for 3.5 hours.

3. Check the meat, and if it’s tender, switch the oven to a grill setting, medium to high temperature. Pour away the liquid (mixture of fat and cooking juices). Completely remove the foil that was covering the meat, and brush the ribs with the barbeque sauce. Place under the grill for 5 minutes, until the sauce gets sticky.


BBQ sauce

I don’t use BBQ sauce very much because I don’t really like the ones you can buy. So when I do  need it, I make my own, and it’s so much better than the shop bought ones! All you need to do is put all the ingredients together, simmer it for an hour whilst stirring occasionally, and voila! My recipe is with a little bit of heat to it. It doesn’t give you a huge amount, so you might want to double or triple the amounts (this amount is perfect for cooking beef short ribs for two).

120ml tomato ketchup
200ml water
2 tbsp apple cider vinegar
4 tsp dark brown muscovado sugar
1/2 tsp black pepper
1/2 tsp onion powder
1/2 tsp mustard powder
1 tsp lime juice
1 tsp Worcestershire sauce

Place all the ingredients in a pan and bring to boil. Immediately reduce to simmer, and keep simmering uncovered for an hour. Stir occasionally.

img_3264

Chicken stir-fry

When you’re on holiday, eating out every day, you start feeling like you’re ready for that home cooked food again. And you know that coming back after being away for a couple of weeks, work will be pretty busy. This stir-fry dish is great, because I always make a really big portion that will last you for several day, whether you want to take it as lunch to work, or have it waiting at home for dinner after getting home late. This is one of my husband’s all time favourite foods that I cook, so it’s a winner all around. Packed with vegetables and other healthy ingredients, it’s also great at boosting your immune system.

2 large chicken breasts

1 carrot

1 green pepper

5 medium chestnut mushrooms

1 brown onion

1 courgette / zucchini

300g bean sprouts

100g green beans

150g mangetout peas

100g baby corn

3 small green chillies

a thumb size piece of ginger

100g cashew nuts

4-5 garlic cloves

150g dry noodles (I use vermicelli)

50ml groundnut oil

50ml toasted sesame seed oil

50ml dark soy sauce

1 tbsp light soy sauce

1 tbsp fish sauce

1 tbsp rice vinegar

1 tbsp lemon juice

I tend to chop all ingredients beforehand, because the actual cooking phase will be quite quick, and you won’t have time to chop the next ingredients. I usually have two containers; on box number 1 I put all the ingredients that require slightly longer cooking time, and box 2 the ingredients that will be added a little bit later.

1. On box no1, peel and slice the carrot in match-like sticks. Chop the green beans in about inch size pieces. Rinse and drain well the mangetout, and add to the box. Finely chop the chillies, and peel and finely chop ginger, and also add the cashew nuts to the box no1.

2. For the box no2, deseed and slice the pepper. Slice your onion and mushrooms, and cut the courgette into strips like the carrots. Cut the baby corn into pieces, and finely chop the garlic.

3. Cut the chicken breasts into thin strips. Heat the groundnut oil in a large wok, and add the chicken. Stir around for about 30 seconds – 1 minute, then add the ingredients from the box no1. Fry, stirring, for about 5 minutes.

4. Add the ingredients from the box no2 and stir. You’ll want to fry everything for about 5 minutes again. While doing this, boil some water, and pour over the noodles. You only want to soak the noodles (if using vermicelli) for 3 minutes. Do check the packaging for how long you need to soak the type of noodles you’re using. Drain the noodles well.

5. Add the bean sprouts to the wok, stir in for couple of minutes, then add the noodles. Add all the remaining liquid ingredients over the noodles, this will help you separate and stir the noodles into the rest of the dish more easily.

Restaurant review: Aquavit, NYC

How this restaurant has managed to get two Michelin stars is beyond me. Now, before anyone says that perhaps I just don’t get Scandinavian food, A) I am Scandinavian and B) I’ve had Scandinavian food that has been very good in other restaurants, so that’s not it. Also, I’ve been to around 40 Michelin star restaurants, so I do have plenty to use as comparison. The step from one to two stars is big, and a two-star-restaurant really should excel in many aspects. Unfortunately, Aquavit disappointed in all aspects, and I don’t think it’s worthy of any stars. Perhaps the inspectors were on too much (free) champagne when inspecting Aquavit?

From staff to the food, everything just seemed a bit ‘off’. Now, there we couple of members of staff who were friendly and good, but the rest just gave a bad vibe, like they didn’t want to be there, as well as giving a scruffy impression. The sommeliers knew their stuff about what they were talking about, however the actual wine pairing to our Seasonal Tasting Menu didn’t impress either. Overall impression was that service was sloppy. I had wine poured to a wrong glass (old, used one instead of the new, clean one), and the cutlery was always placed in completely wrong angles etc. It’s these kind of little things that should not be happening in a place of this calibre.

My prediction is that Aquavit will be losing it’s stars, they most certainly are not worthy of them. For me, they are amongst one of the three worst Michelin star restaurants I’ve been to, my husband thought the are in fact the worst.

For the first Amuse Bouche we were served a Swedish pancake and smoked salmon. It was ok enough in flavour, however not amazing, and was a little bit difficult to eat by hand, as it was quite a floppy pancake. We thought they’ll need to improve to be the required standard.

Second appetiser and ‘palate cleanser’ was mussel with seaweed broth. The broth was ok, but tasted quite bland. The taste of the mussel wasn’t great, and it had some sort of dry crumbly topping, which made it dry. It tasted somewhat weird and unpleasant. We didn’t understand how this was called a palate cleanser, which are usually fresh, light and sharp on the palate, as this was not that. My husband thought the mussel was awful.

The butter test was passed nicely, as the butter was fluffy and very soft. The bread however didn’t impress.

The first actual course of scallop and sea urchin had a really weird, terrible taste to it. My husband thought it was the worst scallop dish he’s ever had, and I wouldn’t be far behind him.

I got my hopes up when the Arctic char and kavring dish came. It was ok for me, however my husband didn’t like this one either. The dish was edible, however not worthy of two stars. A common nominator for all the dishes during the meal seemed to be a weird taste throughout, and there were too many pickled things that weren’t even pickled in a nice way. This dish was also lacking some attention to detail. I love a dish of salmon or fish from the same family, with some dill and wonderfully pickled cucumbers. The lack of attention to detail was that the cucumber had the skin on. Now, I can easily name places where the cucumber balls have been pickled better, are fully round balls and have no skin on them. Not impressed.

The Spanish turbot and sunchoke dish was the best of the meal at that point, however still not the greatest of flavours. The fish was cooked fine, it was nice and juicy.

Next up was a mini slider isterband and apple. It was ok, however bland, and didn’t really bring anything to the meal.

I was hoping the duck and honeynut squash dish was going to rectify the so far bad experience, but again left you wondering where the two stars have come from. The duck did have a crispy skin, which was positive. The squash disk was too undercooked and therefore unpleasant. Overall, again, the flavour of the whole dish was disappointing.

The palate cleanser of lingonberry and ginger was the best part of the dish. Lingonberries can be very sour, however their taste had been sweetened just right, and surprisingly the ginger went quite well with the lingonberry.

The wild strawberry and pistachio cake was unfortunately again somewhat bland. I was excited about the wild strawberries, as their taste is truly magnificent and sweet (I have picked these straight from the bushes in the past), but sadly they didn’t have any of the flavour I know these strawberries should have. And see from the picture yourself if you can spot why I would once again say they need to up their game when it comes to attention to detail.

Rating: ★☆☆☆☆

Chinese chicken noodle soup

I love this basic Chinese soup. I make different variations of it, sometimes with chicken, sometimes with king prawns. It’s also easy to add / leave ingredients out, I sometimes add thinly sliced red peppers, as well as sesame seeds on top for visual effect. Also, I don’t always use the egg. The only thing however that is a must to me, is to have my homemade chicken stock in the freezer. I’ve never made this soup with shop bought stock, and I’m not interested in trying it either. This doesn’t mean you can’t try it of course, I just don’t know how that kind of stock would affect the end taste. Sometimes I use chicken cut in pieces, today I wanted to use shredded chicken.

serves 2
1 egg
1 tbsp sesame oil
1 spring onion
2 chestnut mushrooms
half a thumb size piece of fresh root ginger
1 small green chilli
2 cloves of garlic
1 tsp caster sugar
1/2 tsp salt
1 tbsp light soy sauce
800-900ml chicken stock Homemade chicken stock
vermicelli rice noodles
1 chicken breast

1. Poach the chicken breast in the simmering stock for 10-15 minutes.

img_1406

2. Finely chop garlic, ginger and chilli.  Slice the mushrooms and spring onion. Remove the chicken breast from the stock, and cool. Add garlic, ginger,chilli, mushrooms and spring onions to the liquid, and simmer for few minutes.

img_1407

3. If using the egg, beat it together with the sesame oil. Add all other remaining ingredients to the stock apart from the egg and chicken. Cook for few minutes, and add the vermicelli noodle. The noodle I use is a packet of 5 ‘blocks’, total weight of 225g. All that is needed is one of the blocks.

4. Once the chicken has cooled, shred it by hand. It will very easily break into strands when you start pulling it apart. One breast gives you surprisingly much. Once shredded, add to the stock.

img_1408

5. Pour the egg to the stock in a fine stream. Stock will become cloudy at first, but once the egg is cooked, stock will be clearer again. Pull egg into strands by a fork or chopsticks.

Roasted red pepper soup

This tasty soup is light and healthy, and just seeing the vibrant colour makes you want to tuck your spoon in.

5 red peppers
1 large onion
4 garlic cloves
450g tomatoes
900ml chicken stock, click here for recipe (or for vegetarian version, vegetable stock)
2 tbsp balsamic vinegar
3 tbsp olive oil
salt
black pepper

1. Cut the peppers in half, and core and deseed them. Place on a foil lined oven tray, skin side up. Brush with 2 tbsp olive oil, and grill under medium to high temperature for about 10 minutes, until the skin is getting black, and peppers soften. Remove from the oven, wrap in the foil and let cool for about 10 minutes.

img_2692

2. Boil some water. Dip the tomatoes in the water for about 30 seconds, and take them back out. We are not cooking them at this stage, this will just allow for the skin of the tomatoes to come off easily. Peel and chop the tomatoes.

3. Peel and roughly chop the onions, and peel and finely chop the garlic. Fry the onion in 1 tbsp of the olive oil for 5 minutes until they become translucent, then add the garlic and fry for 1 minute. Add the tomatoes, stock and vinegar.

4. Peel the blackened skin off the cooled peppers, and roughly chop them. Add to the other ingredients and bring to boil. Cover with a lid, lower the temperature to simmer, and cook for 30 minutes. Set aside to cool, then purée into a smooth soup.

img_2693

5. Pour the soup back in the pan, re-heat, and season to taste.